Serverless application development is growing in popularity. And it's no surprise. Build apps, not infrastructure is an appealing proposition. With serverless, you don't have to manage server infrastructure, you get infinite scalability, and you never have to pay for idle server time.
And the Serverless Framework does one better: it further abstracts building serverless apps into a delightful developer experience. It helps you get a cloud function-powered app up and running, fast.
In this tutorial, I'm going to show you how to get started with the Cosmic JS Serverless Starter app in a matter of minutes. And as a bonus, I'll show you the steps to transform any Node.js app into an infinitely scalable Node.js Serverless App!
Let's get started.
TL;DR
Check out the Cosmic JS Serverless Starter on GitHub.
Install the Cosmic JS Serverless Starter
To install the Cosmic JS Serverless Starter, run the following commands:
npm i -g cosmic-cli
cosmic login
cosmic init serverless-starter
These commands do the following:
- Install the Cosmic CLI
- Login to your Cosmic JS Account (you may need to create a new Bucket, if so, it'll walk you through this 😀)
- Download the Serverless Starter and import the demo content to your selected Bucket.
Once it's downloaded, you'll be prompted to start the app with the following commands:
cd serverless-starter
cosmic develop
Your application should now be running at http://localhost:3000
Get ready for lift off
Now that we have our application running locally, let's get ready to launch it to AWS cloud.
First, we'll need to connect our AWS credentials. (Here's how you can find them.)
After you've retrieved your AWS keys, run the following commands:
export AWS_ACCESS_KEY_ID=your-aws-key-id
export AWS_SECRET_ACCESS_KEY=your-aws-secret-key
We're all set to launch our Serverless Starter to AWS. Run the following command to log in to the Serverless service and deploy your app:
npm i -g serverless
serverless login
COSMIC_BUCKET=your-bucket-slug serverless deploy
The serverless deploy command does all the heavy lifting for us. It performs some magic behind the scenes with our AWS account, then once our app is available, it will provide the endpoints to find the deployed app.
Adding the environment variable, COSMIC_BUCKET, connects our deployed app to our Cosmic JS Bucket via the Cosmic JS API. This enables us to manage content for our newly deployed serverless app from the Cosmic JS Admin Dashboard.
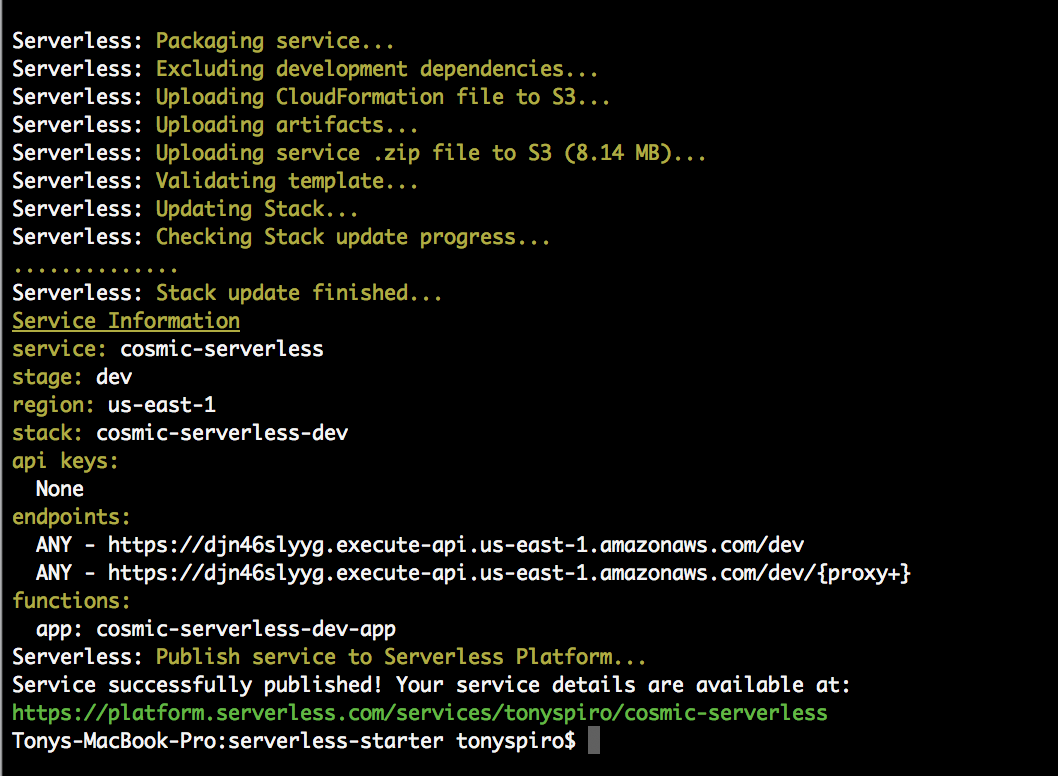
From the output above, you can see the available endpoints where our Serverless app is now deployed.
Make any Node.js app Serverless-ready
So, we ran a few commands and pushed the Cosmic JS Serverless Starter app to AWS. Cool. But let's go a bit deeper.
We're going to take a look at (1) how we transformed the Node Starter app, and (2) how we can convert almost any Node.js app into a serverless app.
Edit serverless.yml
To transform the Node Starter to a Serverless app, we had to create a serverless.yml file and set the config to handle dynamic routes.
This is accomplished in the function > app > events area to indicate the dynamic http events. It looks like this:
# serverless.yml

service: cosmic-serverless

provider:
  name: aws
  runtime: nodejs6.10
  stage: dev
  region: us-east-1
  environment:
    COSMIC_BUCKET: ${env:COSMIC_BUCKET}
    COSMIC_READ_KEY: ${env:COSMIC_READ_KEY}

functions:
  app:
    handler: app.handler
    events:
      - http: ANY /
      - http: 'ANY {proxy+}'
plugins:
  - serverless-offline
Edit app.js
Next, we needed to edit the entry point for the app, the app.js file, to export the main handler function. We also included the serverless-http node module to wrap our Express app for Serverless use.
Here's the app.js file converted to serverless:
// app.js
const serverless = require('serverless-http')
const express = require('express')
const app = express()
const PORT = process.env.PORT || 3000
const Cosmic = require('cosmicjs')
const api = Cosmic()
const COSMIC_BUCKET = process.env.COSMIC_BUCKET || 'node-starter'
const COSMIC_READ_KEY = process.env.COSMIC_READ_KEY || ''
let stage_path = 'dev/'
if (process.env.STAGE === 'local')
  stage_path = ''
const bucket = api.bucket({
  slug: COSMIC_BUCKET,
  read_key: COSMIC_READ_KEY
})
app.set('view engine', 'ejs')
app.get('/:slug?', (req, res) => {
  let slug = req.params.slug
  const year = (new Date().getFullYear())
  if (!slug)
    slug = 'home'
  bucket.getObject({ slug }).then(data => {
    const page = data.object
    res.render('pages/default', { page, year, stage_path })
  }).catch(err => {
    const page = { title: 'Page not found' }
    res.render('pages/404', { page, year, stage_path })
  })
})

module.exports.handler = serverless(app);
In Conclusion
With a few edits, you can quickly transform almost any Node.js app into a serverless app. The Serverless Framework abstracts the complexity of AWS account configuration, and gives you a delightful development experience.
Add Cosmic JS-powered content, and you have an infinitely scalable serverless app with content managed via the Cosmic JS API. No servers to manage, no CMS to maintain. Building apps, not infrastructure, is the future!
If you have any comments or questions about building serverless apps with Cosmic JS, reach out to us on Twitter and join the conversation with the Cosmic JS Community on Slack.